|
|
|
![]()
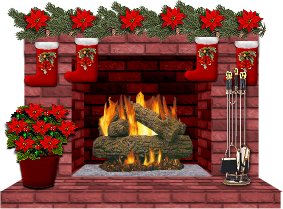
There is nothing like a crackling fire at Christmas time, now
you can
add the warmth of the holiday season to your website... I hope you
enjoy this tutorial.
Please do not copy or use this tutorial at another
website without
written permission from me. Also please do not
add my graphics for download at another website. Thank you. Due to
all the graphics I have left the background plain for faster download time.
Tools Needed:
Paint Shop Pro Version 5 and up
Brick pattern
Ash pattern
Log Fire
And any tubes for decoration
You can download the patterns, log fire and my trip HERE
Unzip the file and place both brick and ash bmp files in the
patterns folder, all others place
in your image folder.
Open a new image 400 X 400 transparent and add a new layer
named topfront.
Using your selection tool draw a rectangle 65, 100 to 300, 125 and flood fill
with
the brick pattern. Now add a drop shadow - Opacity 100% , blur 2.2 and Vertical
1, horizontal 0. This will be your top front of the fireplace.
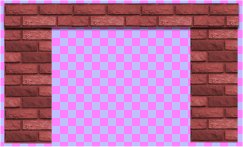
Add a new layer named left front and using the selection tool draw another
rectangle 65, 115 to 113, 241 and flood fill with brick pattern. Copy, paste as
new layer named
right side, mirror and line up on the right side level with the left. ( Paste
again but as a new
image, you will use this for a short cut shortly. )
Your image should look like this:
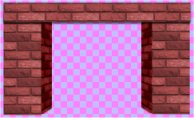
Ok, now take the left image copy you put aside, copy and click
on layer one of the fireplace
and paste as new layer. Now take your deformation tool click and hold the ctrl
key and pull
the right side in until you get the inside sides the way you want them. Let the
ctrl key go and grab the right side and pull in a bit. You can hide the other
layers so you can see your work better. Make sure bottom left is even with the
left front side corner. Go to color/brightness and change the brightness
to -35, this will darken it for a more realistic look. Copy, paste as new layer,
mirror and
line up on the other side. Save your work.
Your image should look like this:
Click on layer 1 again and add a new layer named back. Take
your selection tool and
draw a rectangle slightly inside the left inside across to the right side and
even with bottom
of both inside sides. Fill with brick pattern, color/brightness and lower
brightness to
-60. Save your work. Your image should look like this:
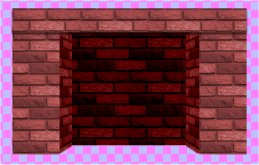
You see how each layer back gets darker, this helps give the 3D look to your
images.
Click on layer 1 and again draw a rectangle slightly larger than the lower
space. Fill
this with the ash pattern Take the deformation tool and hit ctrl and pull the top in and
down until it fits the
empty space. Save your work.

Click on the top layer and add a layer named front floor. Use the selection and
draw a rectangle wider than
the bottom of your image and about an inch in height. Flood fill with the brick
pattern. Push the ctrl key
and push in the top sides and down to make the floor go away from you and also
end up the same
width as the fireplace. Add a new layer and draw another rectangle the
same width as the front
floor and about the width of a row of the bricks. Fill with brick pattern.
It will look like the below image:
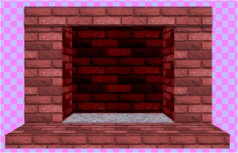
You've got it! The fireplace is finished.
I have zipped above all the goodies to fancy this fireplace up for the holidays.
You may
want to save this image as is for later use for another holiday maybe. Now just
click on
the top layer and add the fire logs, then all other ornaments either of your chose or
those I
made for this tutorial. I hope you enjoyed this tutorial. If you have any
questions or
problems, feel free to contact me.
This website and all graphics are © Copyrighted Web Magic - Suzanna
Please do not link to or download for use at another website without
written permission. You are welcome to link to this tutorial if you would like.
http://users5.50megs.com/webmagic
