|
|
|
How to make Mr. Gobbler Turkey
Tools needed:
Turkey feather image or any feather of your choice
Paint Shop Pro version 5 or up
Little vector node knowledge is a help
You can download the Version 7 feather "here"
Feather in PSP format for other versions "here"
1. Open a new file 400x400 transparent
2. Open turkey feather image
3. Copy and paste feather as new layer in transparent file... place near top centered.
4. Paste another feather as new layer and rotate to left 20 degrees
Line feather ends together as you work
keep pasting turning each feather left by 20 until you reach 100 Make sure all
feathers are on their own layers. ( 20, 40, 60, 80, 100 )
5. paste another feather but turn to the right 20 and continue until you reach 100 same as before.
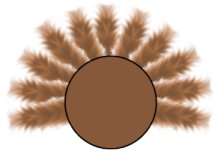
You should end with 12 layers... Shut visibility on layer 1 and merge visible all layers. Save image

You should have a tail that looks like the above graphic
You can colorize the feathers if you would like....
6. Take your color dropper and chose a color from the feathers
for the body of the turkey.
place this color as the background color and black as foreground color
7. Go to your preset shapes and choose eclipse with the following settings:
stroked and filled
line width 2
antialias and vector checked
8. Start where the feathers meet and draw an eclipse for the body of the turkey. It should look something like the following:
9. Click on the vector object selection button, then in tool options click node edit. You will notice the body disappear and replaced by a circle with tabs. ( look below ) The black squares are already in place. The red squares are those you need to add. Hold the ctrl key down and point to those sections. You will see add show up, just click and move to the next square until all are in place. Use the green circles as an idea of how to pull the arrowed squares out. You can play with these until you get the shape you want for his arms.
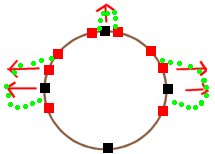
You can hit the selection tab to check on your work then hit the node edit again to continue.
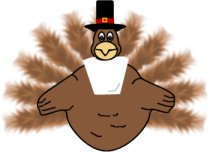
Below is what the body should look like somewhat: The arms can be higher or lower. I didn't spend much time on this sample. The neck really won't show much so just lift up a bit for the neck section.

10. Layer/convert to raster... you can now draw lines for a more realistic look. single line size 2
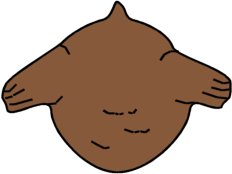
11. Layer new/raster layer...preset object eclipse again - draw a small eclipse for the face, you can node edit and add cheeks if you'd like.
12. Layer new/raster layer... chose a light tan/gold color for your background color leaving black as your foreground color. I used 245/209/131 . draw an eclipse for the nose. Convert to raster. Single line size 2 draw the mouth. The face should look something like the sample below:
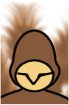
13. Layer new/ raster layer... now we will make the eyes, how you do them is up to you. I find using preset object eclipse the easiest and cleanest, you can then convert layer to raster and copy/paste as new layer for other side. I do the same for the eye ball but you can play around for different affects. I also added a hat and gave him a more pilgrim look to him.
14. Make layer 1 invisible and merge all the other layers. Make layer 1 visible and add a raster layer. This layer is for the feet. You can either draw them yourself or use preset eclipse and play until you get the feet you want. End turkey will look something like this:
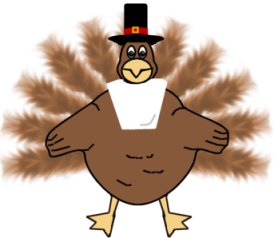
I drew the legs then filled them with nose color. Node Editing looks better.
This tutorial is © copyrighted Web Magic 2000-2001
Please do not copy or place this tutorial at another website without
written permission. Thank You... The turkey you make is yours to use
as you like :-) I hope this tutorial was clear, it's my first.
If you enjoy learning how to make all kinds of different
objects and
are a user of PSP, visit Flybynight Graphics Group. I have learned
so much from this wonderful group. Everyone is so friendly and helpful.
